Set up OAuth in Snowflake
Before connecting in Unblocked, create a dedicated read-only role and user, grant it access to the data you want indexed, and register an OAuth security integration restricted to that role. This gives you the Client ID and Client Secret that Unblocked needs.1
Create a read-only role and user
Run the following SQL in Snowflake (using a role with the
ACCOUNTADMIN privilege) to create a role and user dedicated to the Unblocked integration, and grant the role usage on your warehouse. Replace <your_secure_password>, <your_warehouse>, <your_database>, and <your_schema> with values for your account:Choose a strong, unique password for
UNBLOCKED_PASSWORD. Unblocked authenticates with OAuth, so this password isn’t used after setup, but it must satisfy your account’s password policy.2
Grant access to your data
Grant the role
USAGE on the database and schema you want Unblocked to index, plus SELECT on current and future tables. Replace <your_database> and <your_schema> with the database and schema you want to grant access to:Repeat this step for each additional database or schema you want Unblocked to access. For narrower access to individual tables or views, or broader access to an entire database, see the optional grant variations below.
3
Create the OAuth security integration
Create an OAuth security integration and restrict it to the For more details on this command, see Snowflake’s CREATE SECURITY INTEGRATION documentation.
UNBLOCKED_READONLY_ROLE role you created:4
Retrieve your credentials
Run the following to retrieve your Client ID, Client Secret, and account identifier in one query:Use the
SNOWFLAKE_ACCOUNT value as your account identifier, CLIENT_ID as your Client ID, and CLIENT_SECRET as your Client Secret. You’ll enter these in Unblocked in the next section.Grant access to a single table or view (optional)
Grant access to a single table or view (optional)
If you only want Unblocked to access specific tables or views instead of an entire schema, grant Repeat the last two grants for each additional table or view you want Unblocked to access.
SELECT on those objects individually instead of the schema-wide grants above. Replace <your_database>, <your_schema>, <your_table>, and <your_view> with your own values:Grant access to an entire database (optional)
Grant access to an entire database (optional)
If you want Unblocked to access every schema, table, and view in a database, including ones created later, grant access at the database level instead of the schema level. Replace
<your_database> with your own value:Revoke Unblocked's access (optional)
Revoke Unblocked's access (optional)
If you need to remove Unblocked’s access to Snowflake, run the following SQL to delete the OAuth integration, user, and role:
Connect in Unblocked
With your Client ID, Client Secret, and account identifier ready, connect Snowflake in Unblocked.1
Connect Snowflake
In the Unblocked sidebar, click Settings, then Data Sources, then Connect another data source, and select Snowflake.
2
Enter your account and OAuth credentials
Enter your Snowflake account identifier (for example, 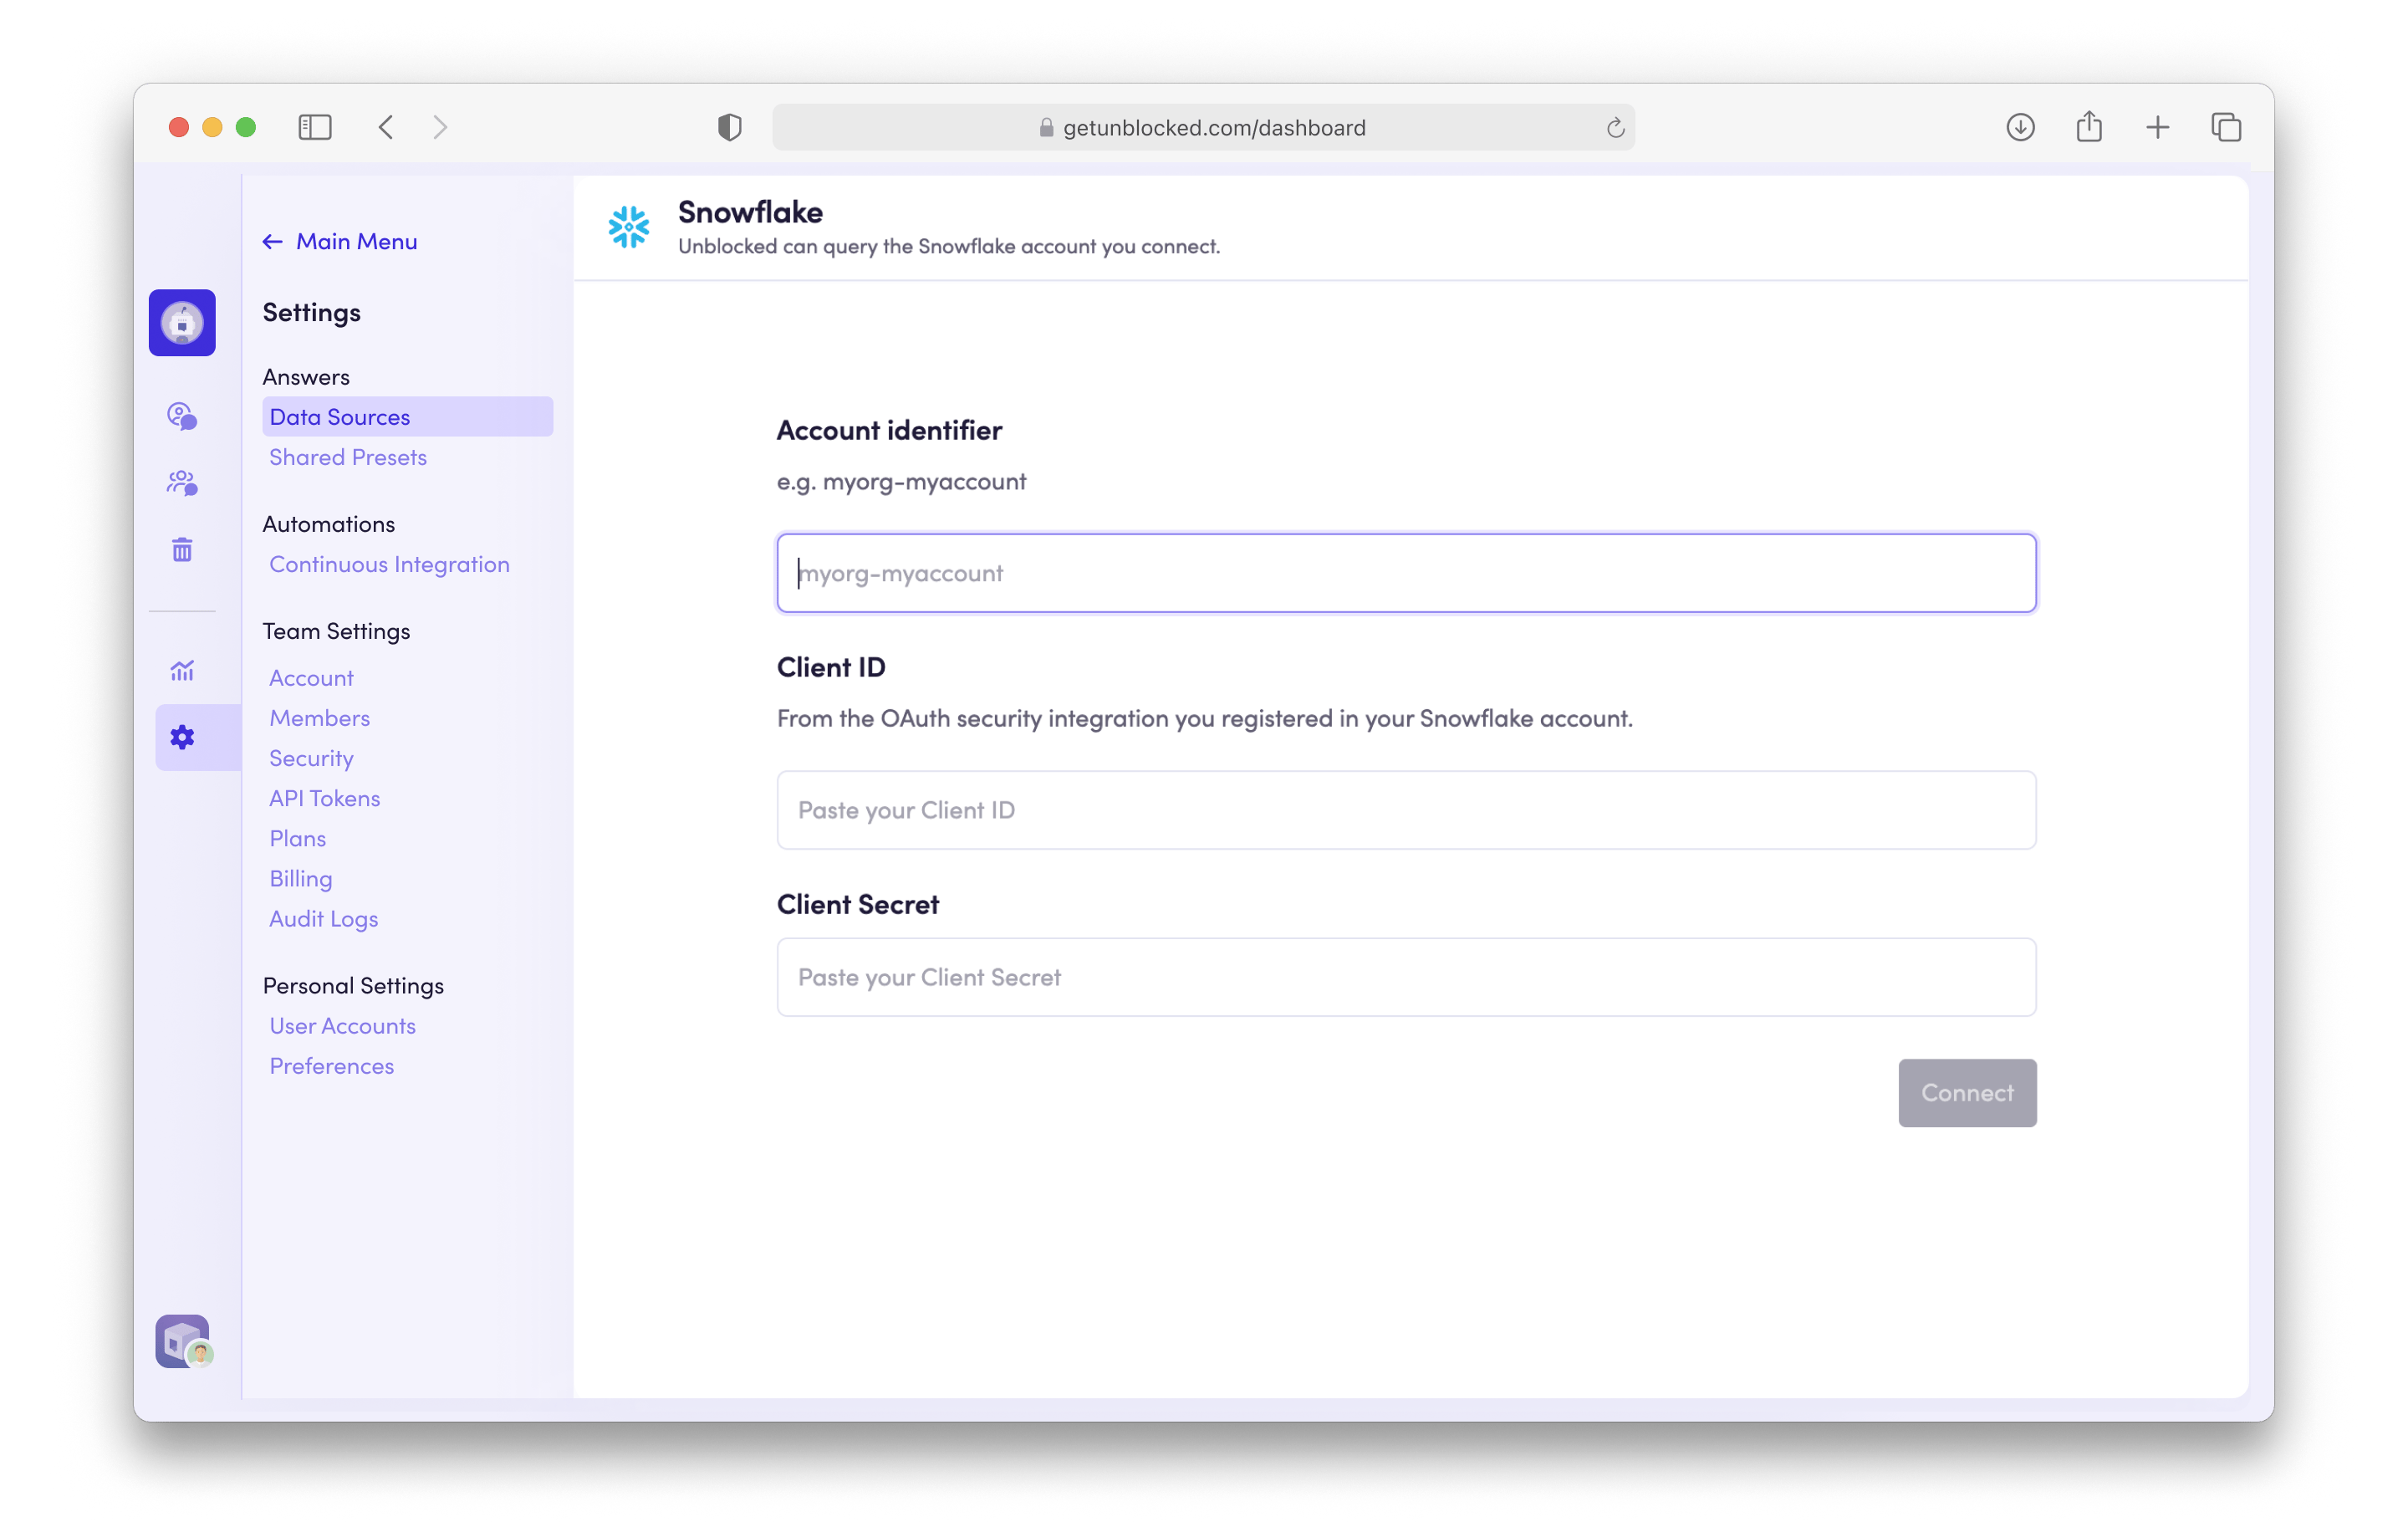
myorg-myaccount), along with the OAuth Client ID and Client Secret from the OAuth security integration you created in your Snowflake account. Click Connect.3
Authorize Unblocked
You’ll be redirected to Snowflake to authorize Unblocked’s OAuth access. Click Allow to authorize.
4
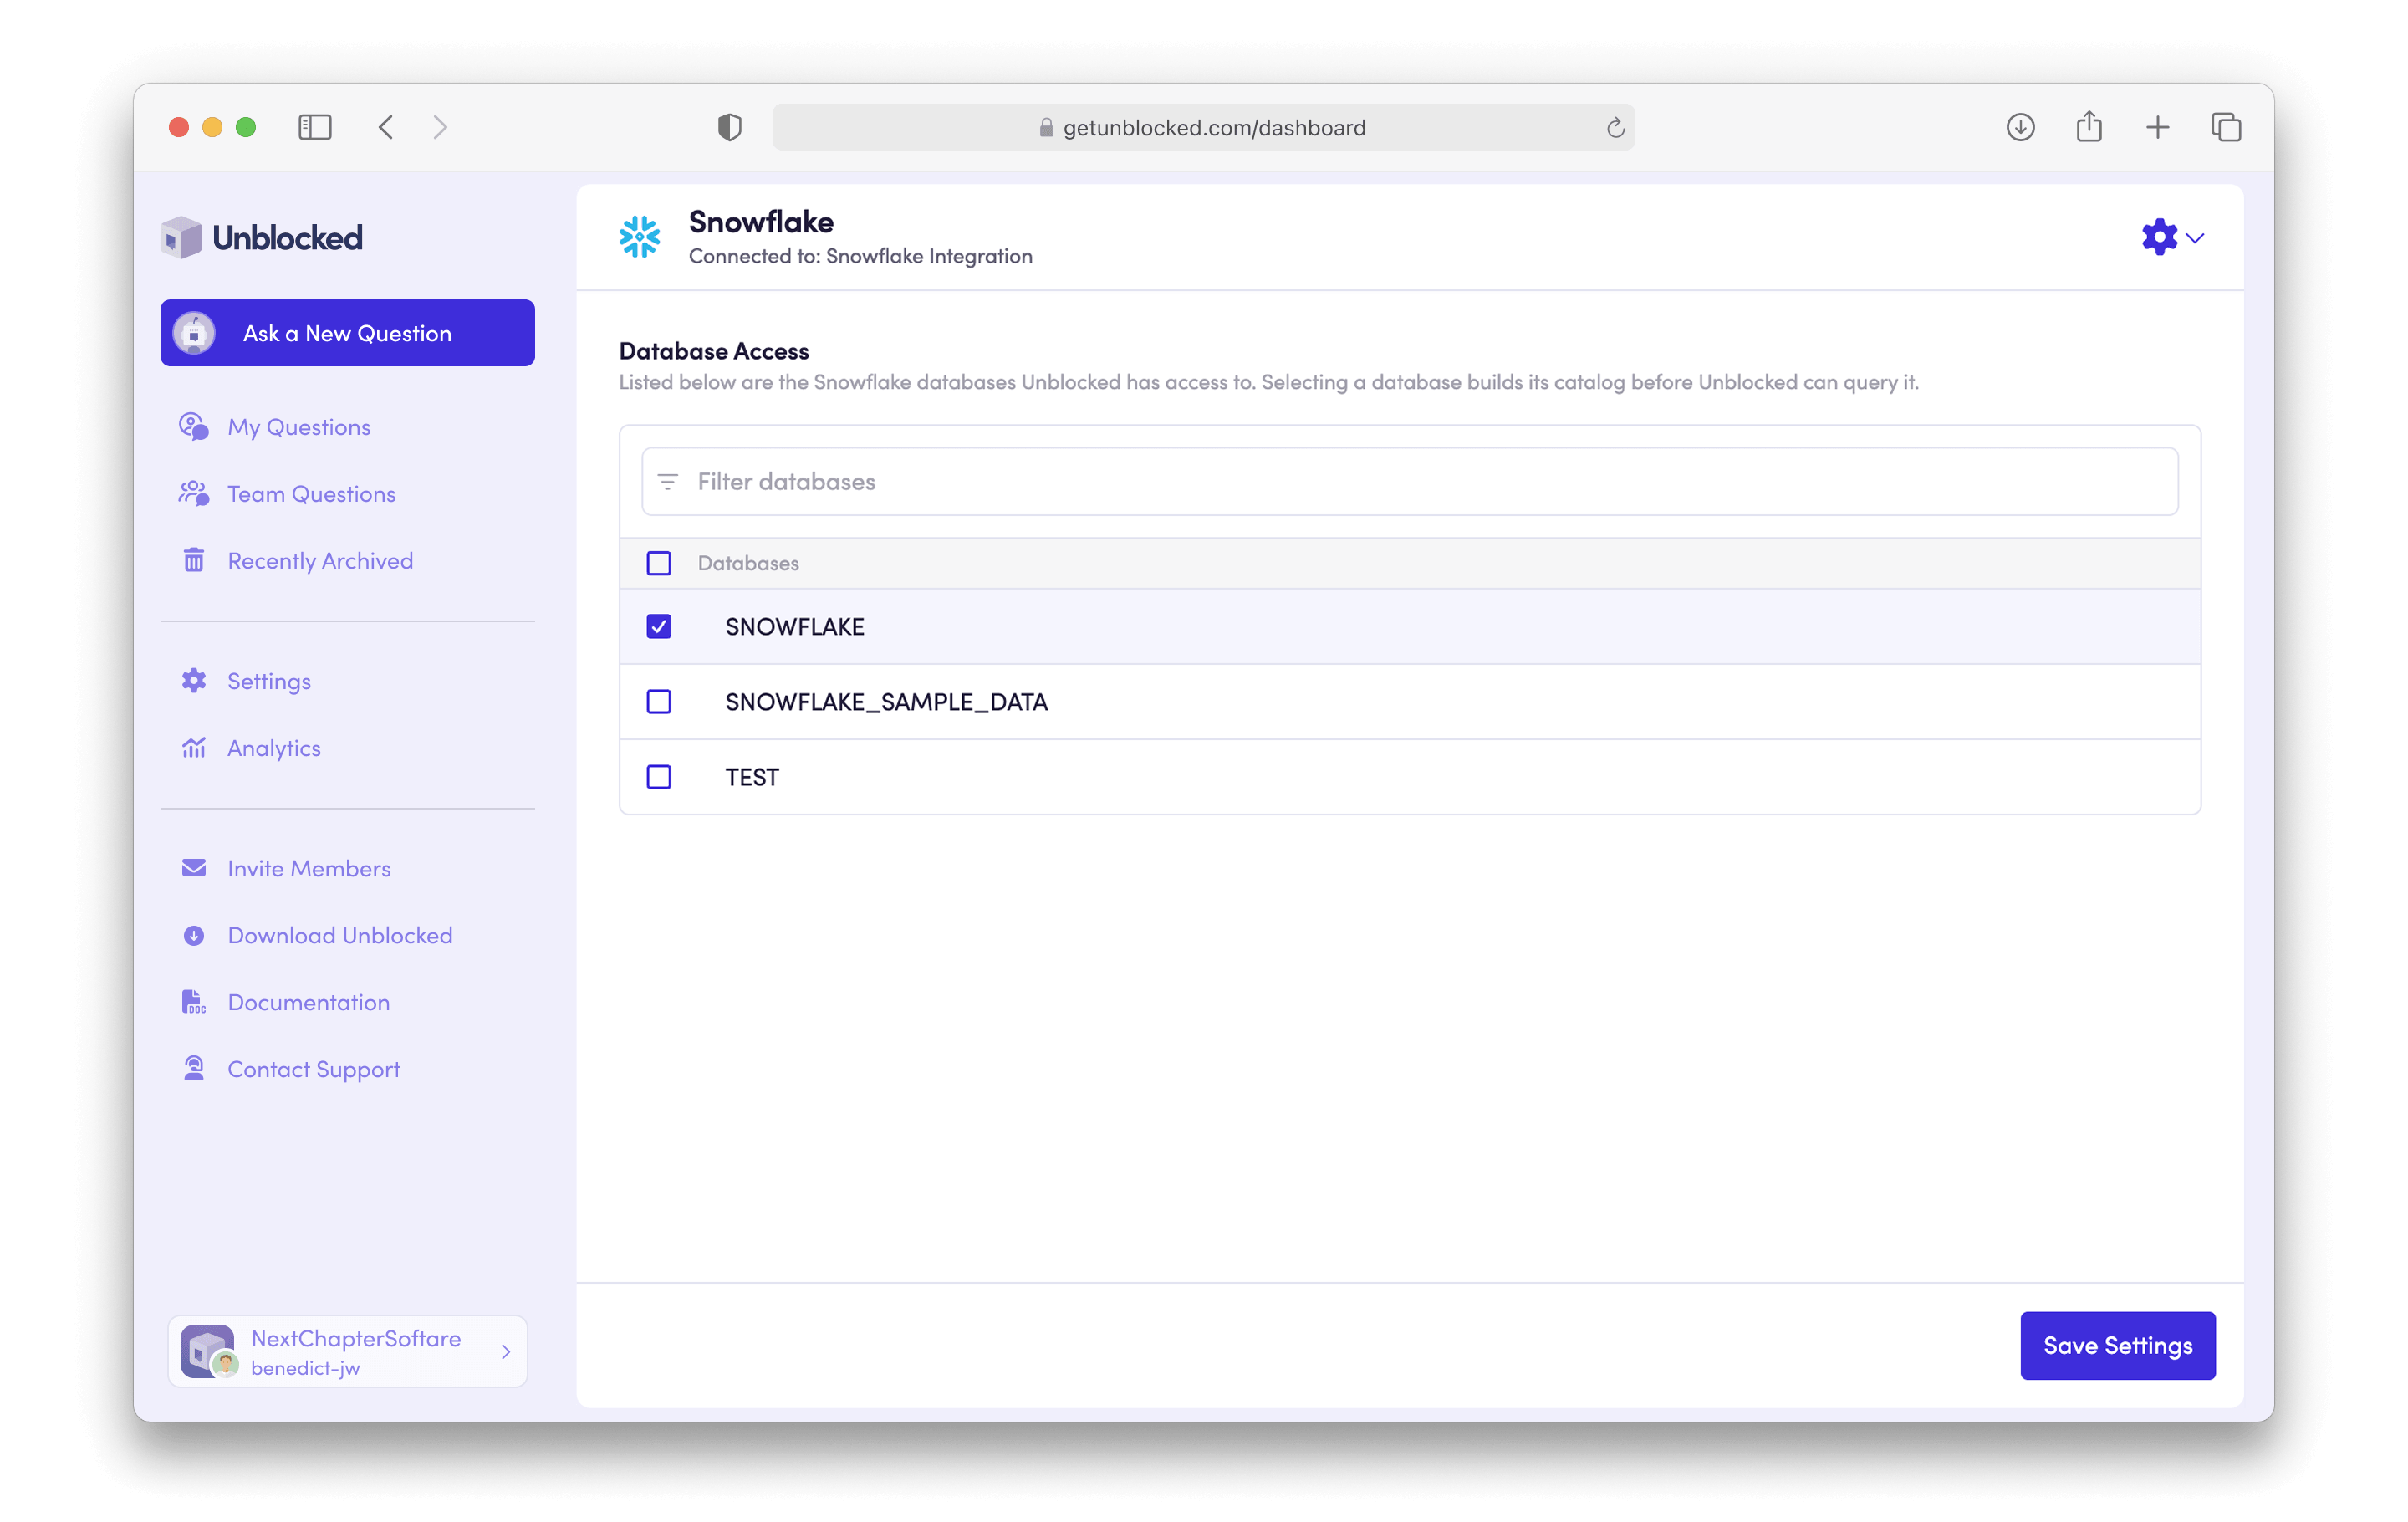
Select your databases
After authorizing, you’ll be redirected back to Unblocked, where you can select which Snowflake databases Unblocked should index. A list of available databases is shown with a search box to filter them. Select the databases you want Unblocked to access, then click Save Settings. Unblocked will begin referencing data from your selected Snowflake databases in its answers.