> ## Documentation Index
> Fetch the complete documentation index at: https://docs.getunblocked.com/llms.txt
> Use this file to discover all available pages before exploring further.
# Jira Data Center
> Connect your Jira Data Center instance to Unblocked
To connect Jira Data Center with Unblocked, you need to be on the Enterprise
Plan. You can view all the features of Unblocked's plans on our [pricing
page](https://www.getunblocked.com/pricing).
When you connect Unblocked with your Jira Data Center projects, you'll provide Unblocked with important context on how and why your codebase works. Most importantly, Unblocked will be able to use the details in your Jira Data Center projects to answer questions you ask it, and it will provide links back to the issues that it used for easy reference.
## Connect Jira Data Center
We recommend having a site admin connect your Jira Data Center site with
Unblocked. [Data Shield](/team-settings/data-shield) for Jira Data Center is
only supported when the token used to connect with Unblocked belongs to a site
admin.
### Sign in to Unblocked
Whether you sign in with a source code manager or your SSO provider, you first need to authenticate to Unblocked to begin this integration.
Once you've signed in, click **Settings** in the sidebar, then **Data Sources**, then **Connect another data source**. Scroll to the documentation section and select Jira Data Center.
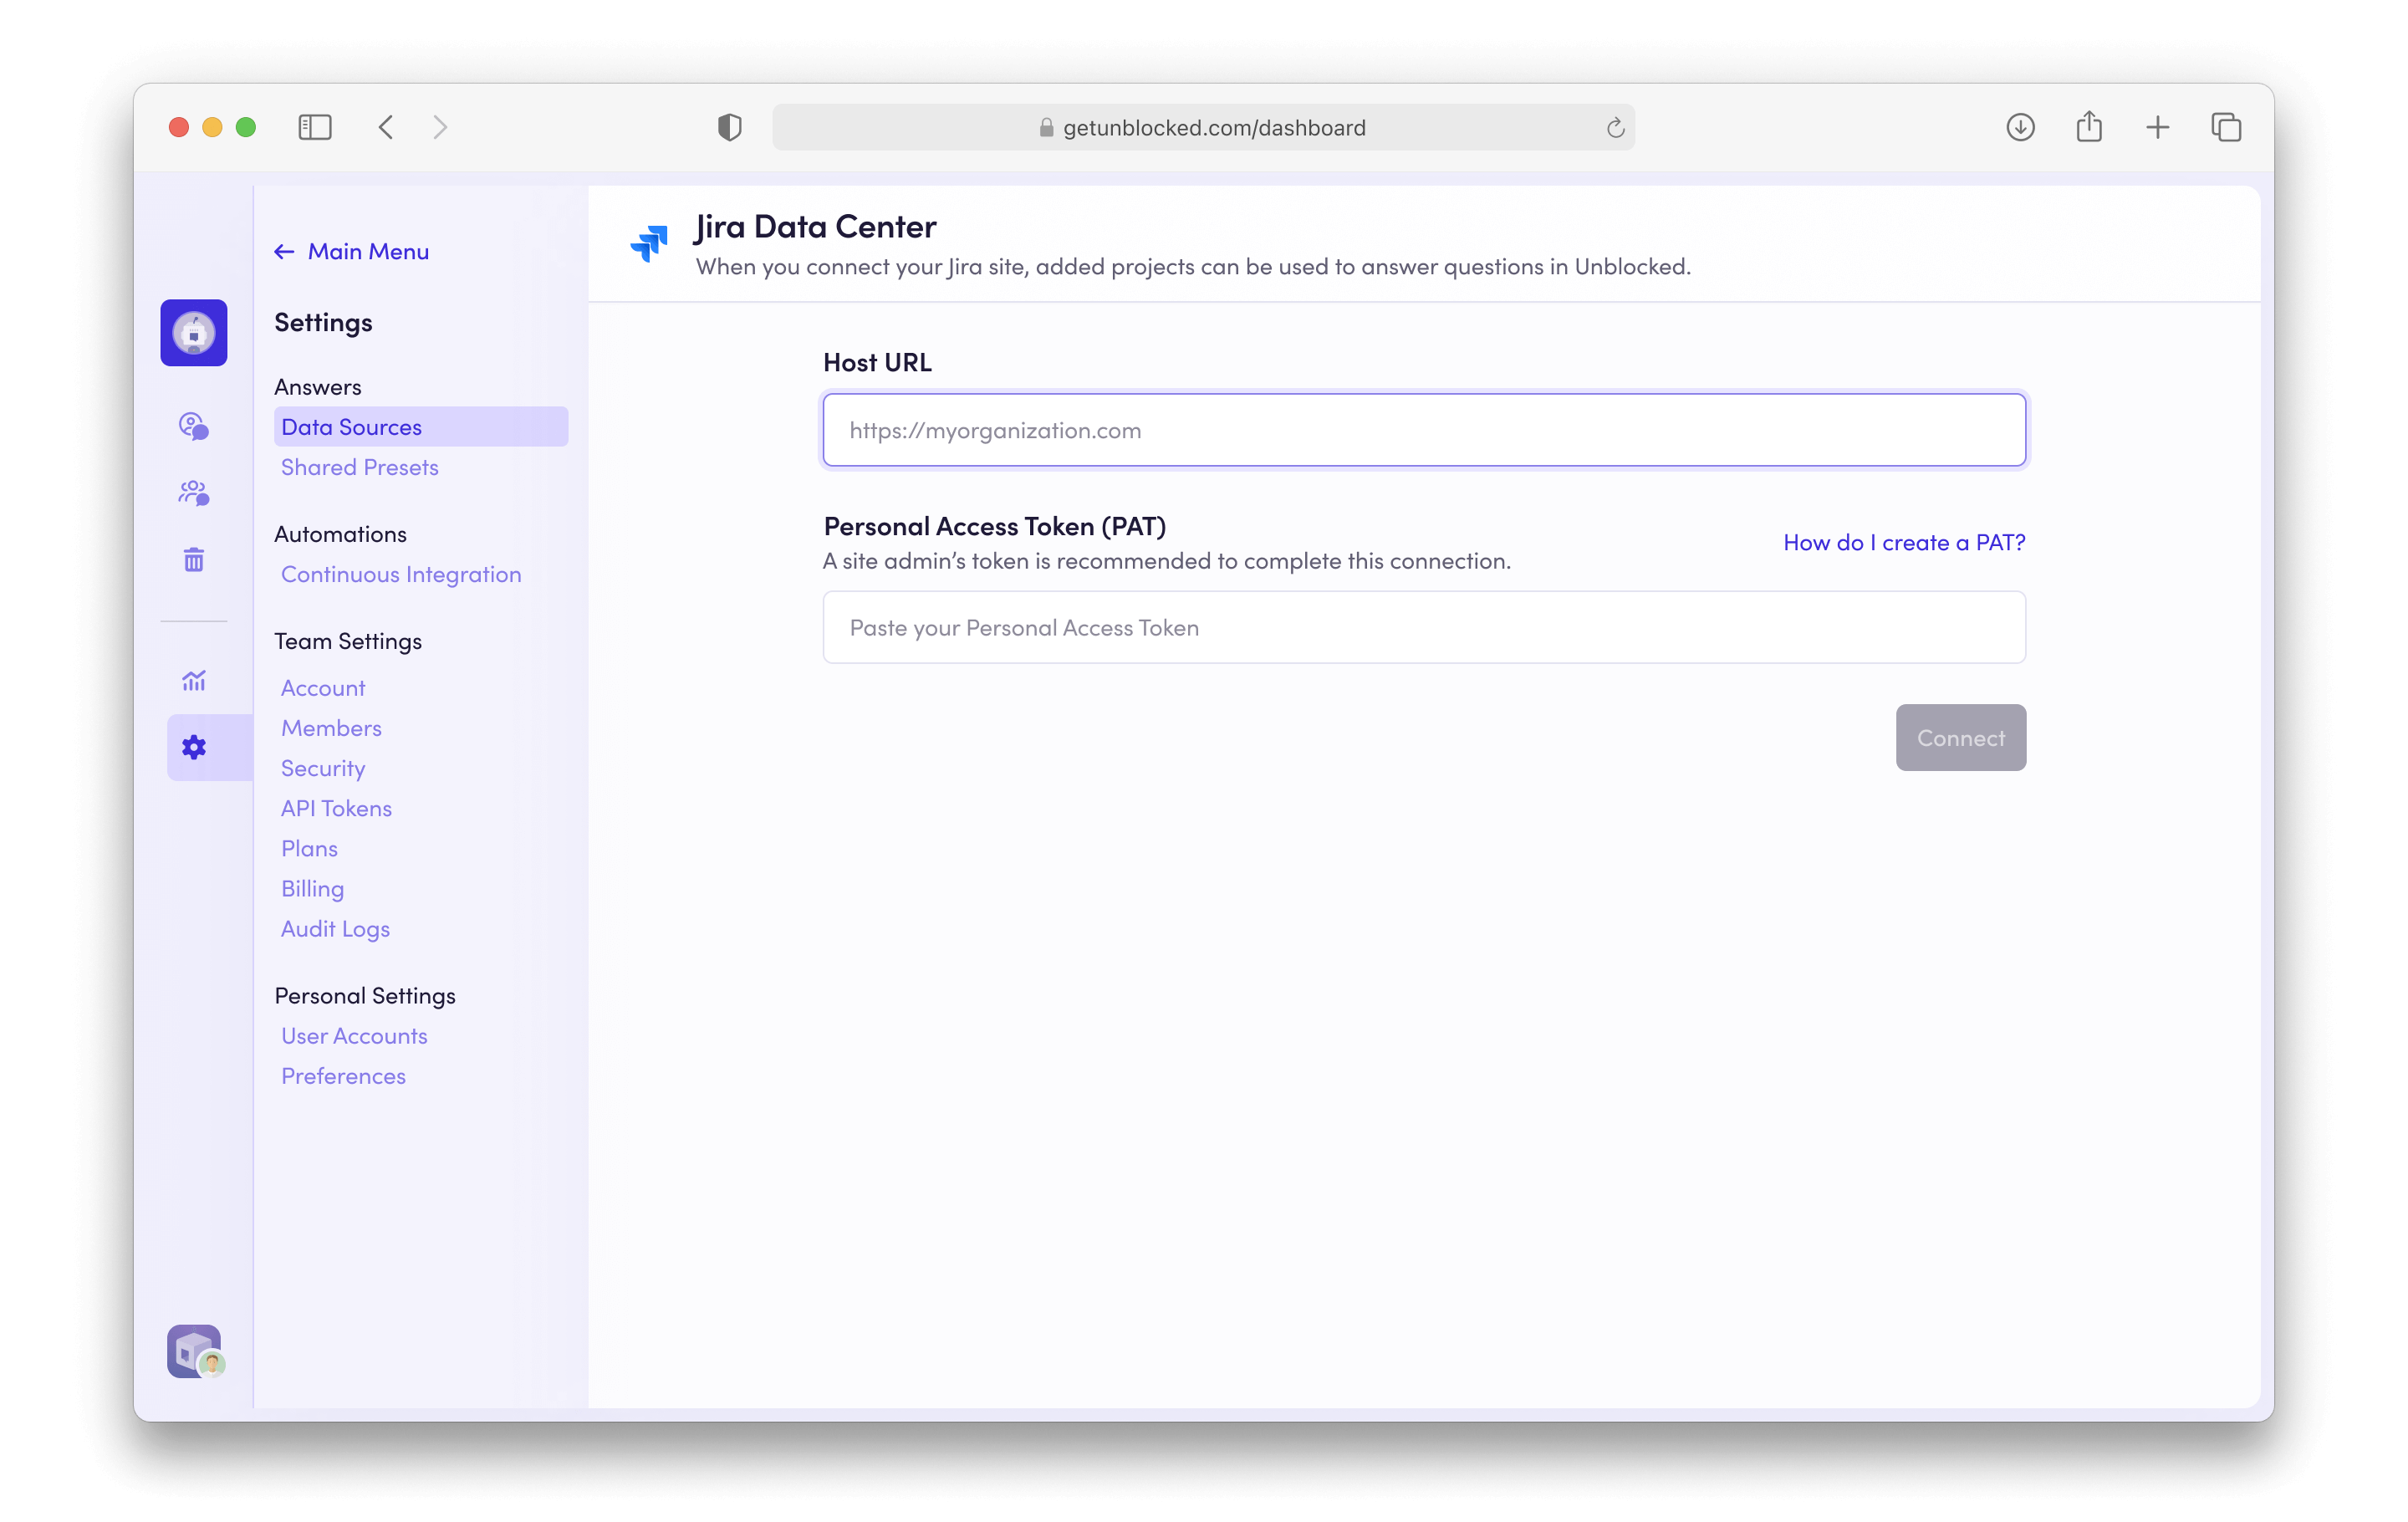
This will present you with a form for connecting Jira Data Center with Unblocked. Enter your team's Jira Data Center site URL and your personal access token on this page.
 ### Creating a Personal Access Token
In order to connect with Unblocked, you will need a Jira Data Center personal access token. If you prefer to create a new personal access token, you can do so within Jira Data Center.
To create a personal access token, navigate to your Profile page, accessible by clicking on your avatar in the top right corner of your Jira Data Center site. From your Profile page, select Personal Access Tokens and click Create token.
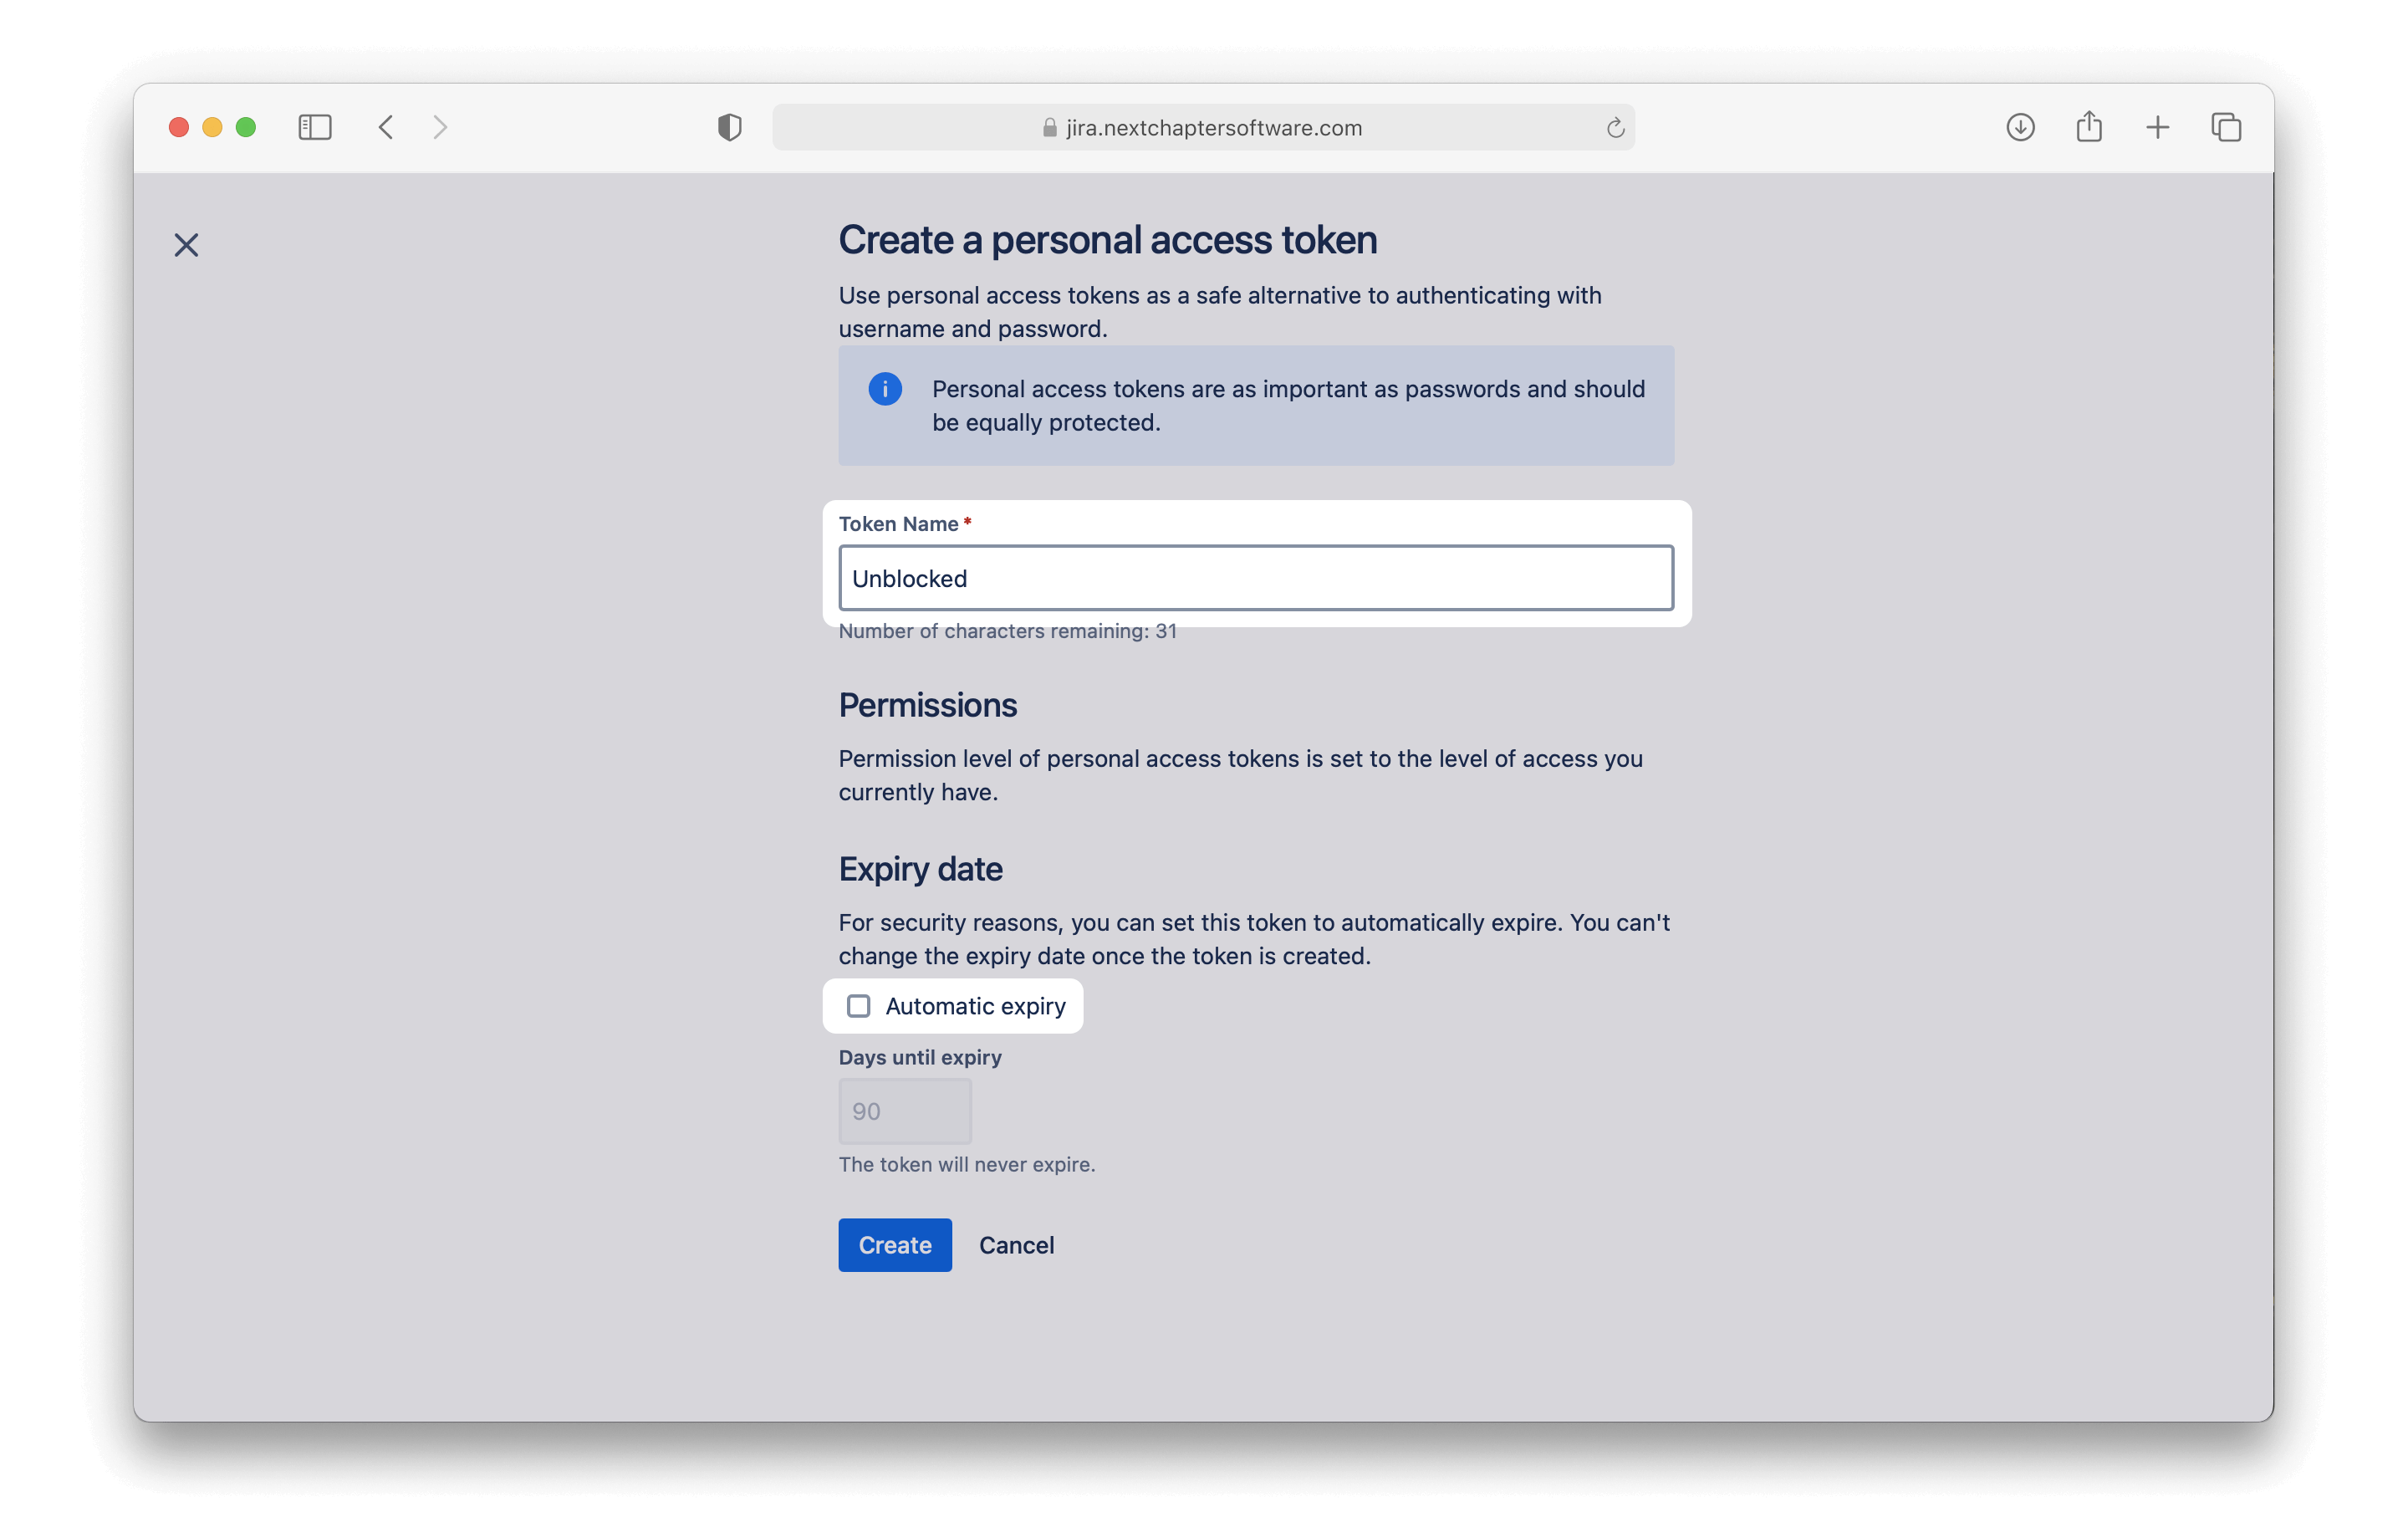
On the following page, provide a token name, ensure "Automatic expiry" is unchecked, and click Create. Copy the token then return to Unblocked to paste the code into the Personal Access Token (PAT) field.
### Creating a Personal Access Token
In order to connect with Unblocked, you will need a Jira Data Center personal access token. If you prefer to create a new personal access token, you can do so within Jira Data Center.
To create a personal access token, navigate to your Profile page, accessible by clicking on your avatar in the top right corner of your Jira Data Center site. From your Profile page, select Personal Access Tokens and click Create token.
On the following page, provide a token name, ensure "Automatic expiry" is unchecked, and click Create. Copy the token then return to Unblocked to paste the code into the Personal Access Token (PAT) field.
 ### Connecting Jira Data Center
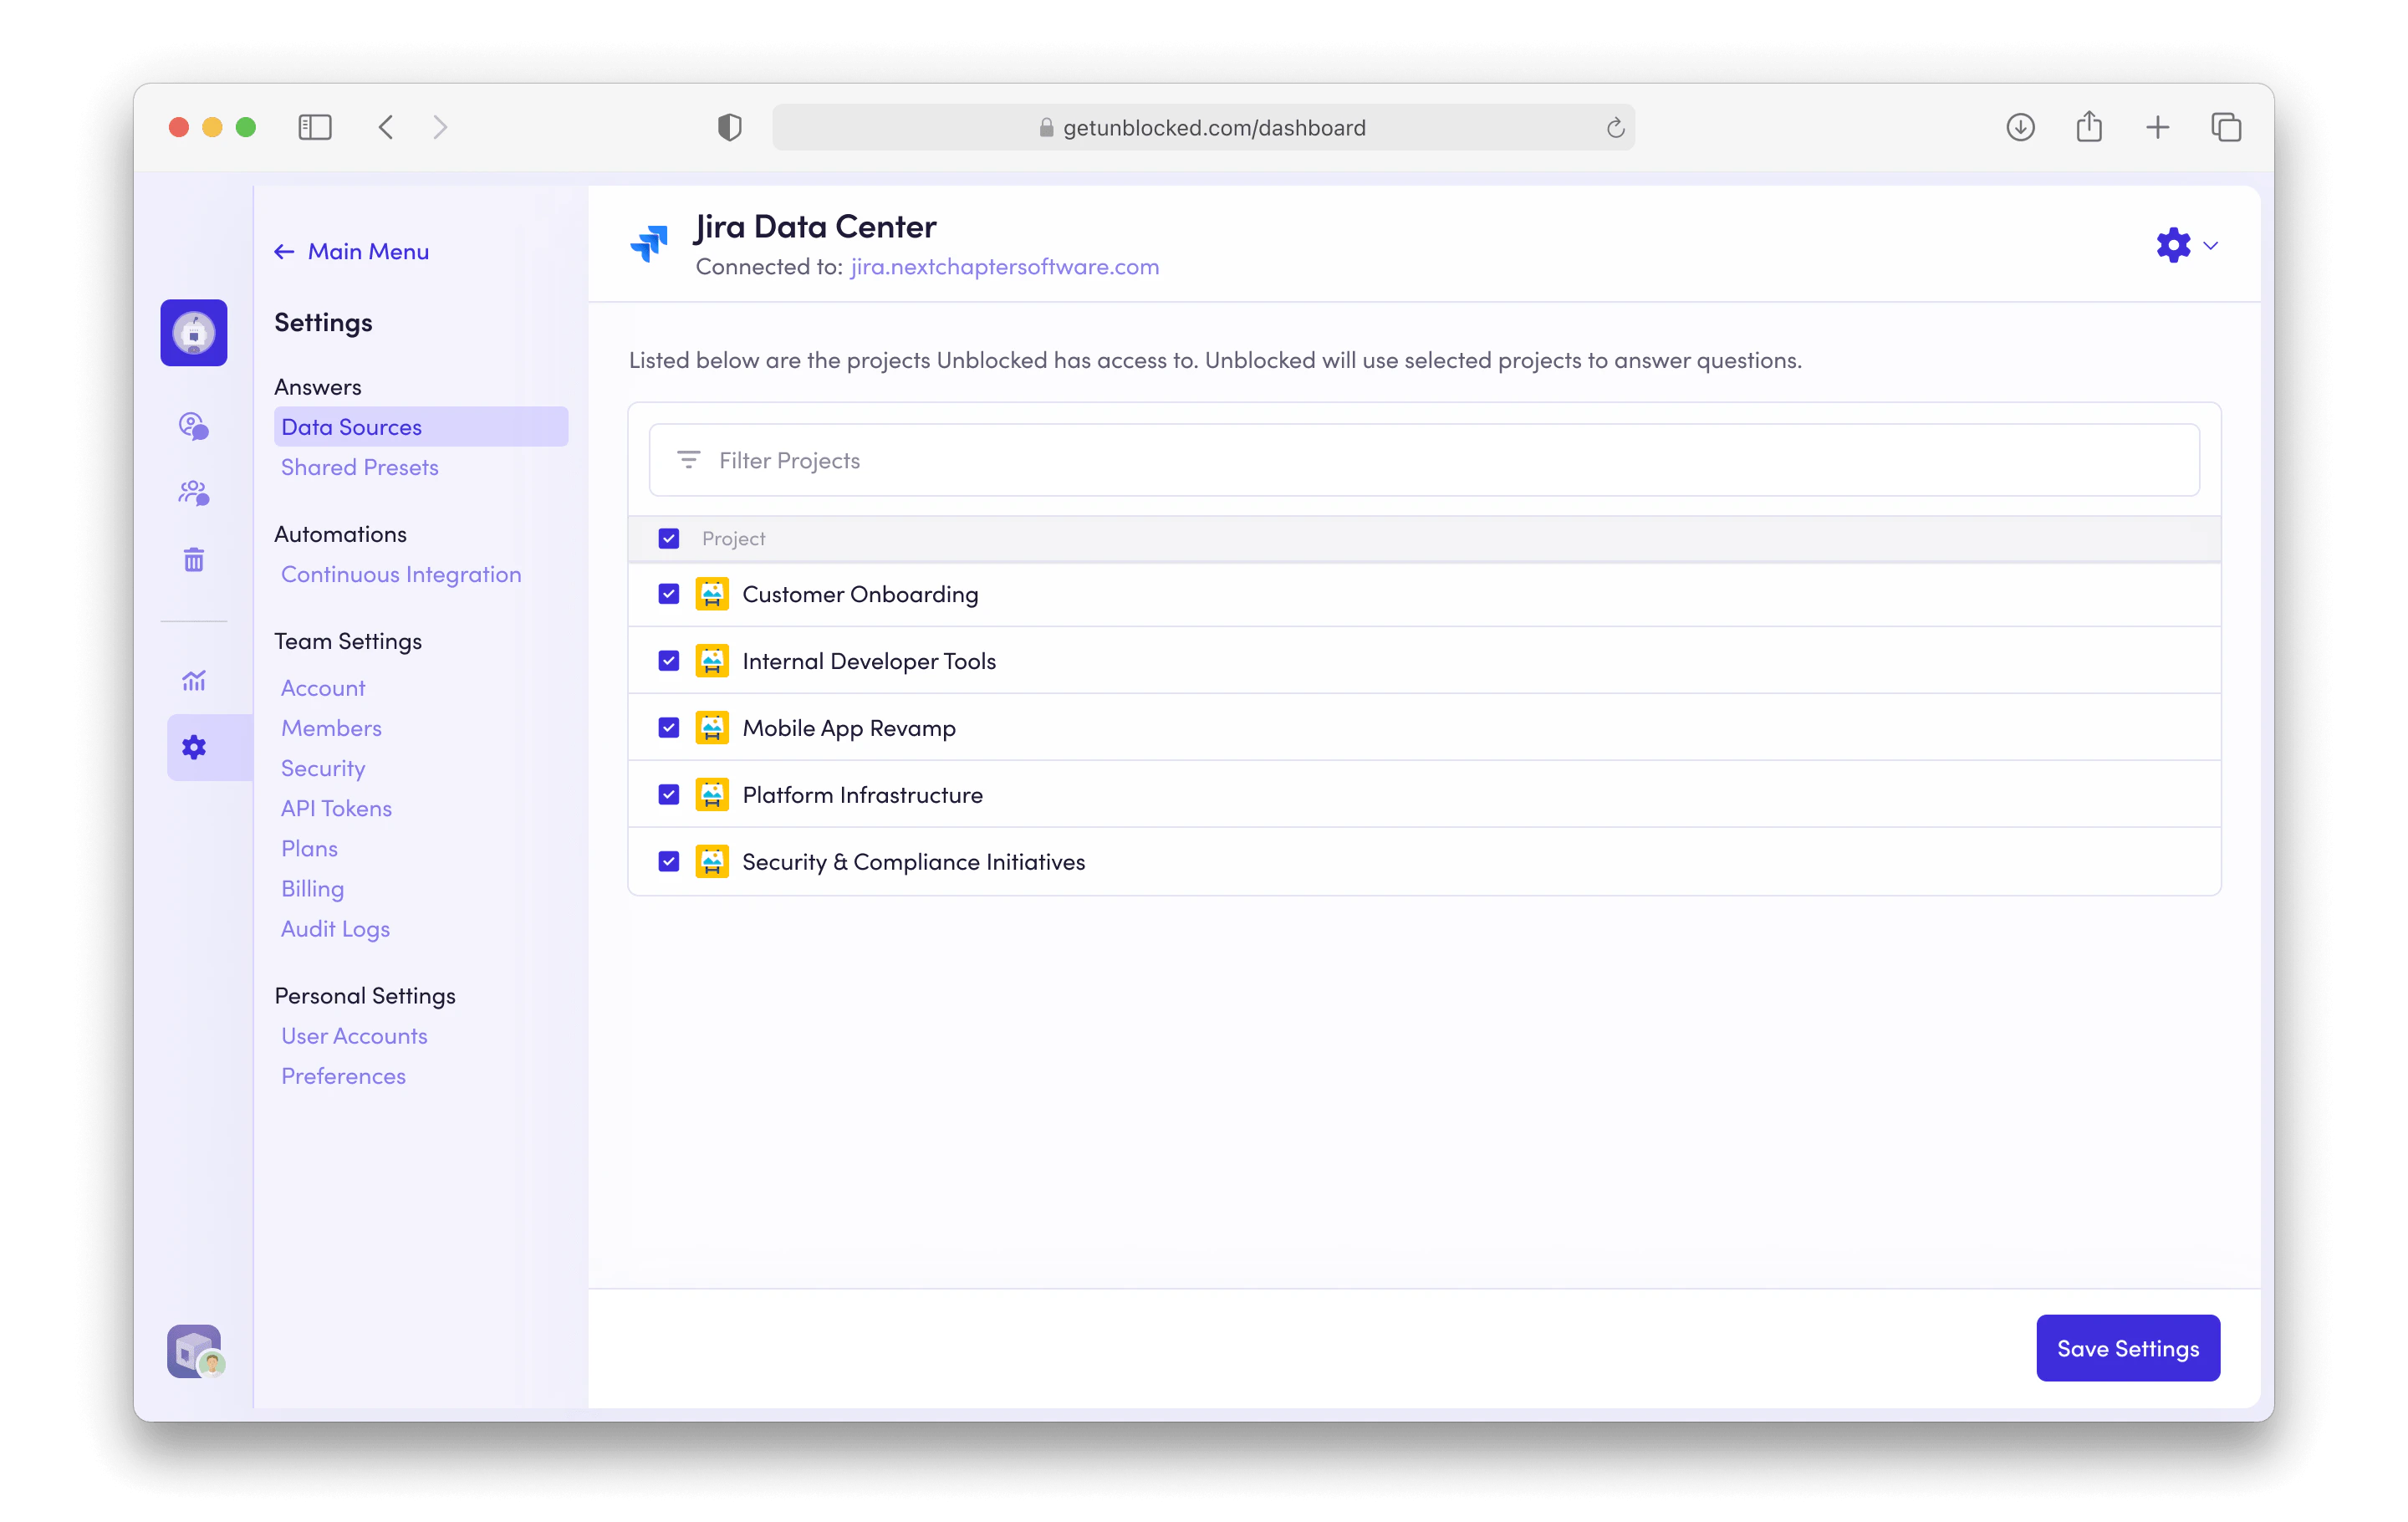 Once you connect Jira Data Center, you have the option to grant access to specific projects for Unblocked to index and search. You will be best served by granting access to all projects, but you can always restrict the scope depending on your team's needs. Using [Data Shield](/team-settings/data-shield), you can also set access permissions that determine which content in your Jira projects will be used in Unblocked's answers.
Once you click **Save Settings**, Unblocked will begin referencing the issues in your Jira Data Center projects in its answers.
Once you connect Jira Data Center, you have the option to grant access to specific projects for Unblocked to index and search. You will be best served by granting access to all projects, but you can always restrict the scope depending on your team's needs. Using [Data Shield](/team-settings/data-shield), you can also set access permissions that determine which content in your Jira projects will be used in Unblocked's answers.
Once you click **Save Settings**, Unblocked will begin referencing the issues in your Jira Data Center projects in its answers.